If you’ve ever triaged bugs, you know the drill. Someone reports an issue, and your first question is: can I reproduce this on a clean install?
For WordPress, that used to mean spinning up a site in LocalWP or WordPress Studio. Enter a title, choose your settings, wait for it to provision, then manually install WooCommerce, then install Query Monitor, then maybe a few other plugins. LocalWP has blueprints, but they’re snapshots of existing sites, so they go stale as soon as plugins release updates. And you end up with dozens of unused local installs cluttering your machine.
Those tools are great for persistent testing sites or local development. But for quick, throwaway bug reproduction, they’re overkill.
WordPress Playground changed this. Sites are ephemeral (not persistent, just temporary). Use it once and close the tab. No cleanup, no clutter. But the blueprint URLs are long and the JSON syntax is hard to remember.
So I made a Raycast script that launches a fully configured WooCommerce Playground site in about two seconds. Type “Woo”, hit enter, and you’re in.

Why This Matters for Bug Triaging
When someone reports a bug, you need to determine whether it’s a WooCommerce core issue or something specific to their setup. A clean Playground site is the fastest way to test this. But the friction of setting one up meant each issue took longer to test, or I’d end up using an existing site that wasn’t truly clean.
Removing that friction changed my workflow. Now I spin up a test site for almost everything. It takes less time than reading the bug report.
What the Script Does
The script opens a Playground site pre-configured with:
- WooCommerce (latest version)
- Query Monitor for debugging
- WC Smooth Generator for sample data
- 25 products and 20 orders already created
- PHP 8.2 and latest WordPress
- A timestamped site name so you can tell your tabs apart
It skips the WooCommerce setup wizard and drops you straight into wp-admin, logged in and ready to test.
Creating the Raycast Script
Raycast script commands are just shell scripts with special comment headers. Here’s how to create one.
Step 1: Create the Script Command
Open Raycast and type “script”. Select Create Script Command.

You’ll see a form with these options:
- Template: Choose Bash
- Mode: Choose Silent (no terminal window)
- Title: Something like “Create Woo Playground Site”
- Description: “Launch a fresh WooCommerce test site in Playground”
- Package Name: This groups your scripts. I use “Playground” for all my Playground-related commands
- Needs confirmation: Uncheck this. You want instant launch.
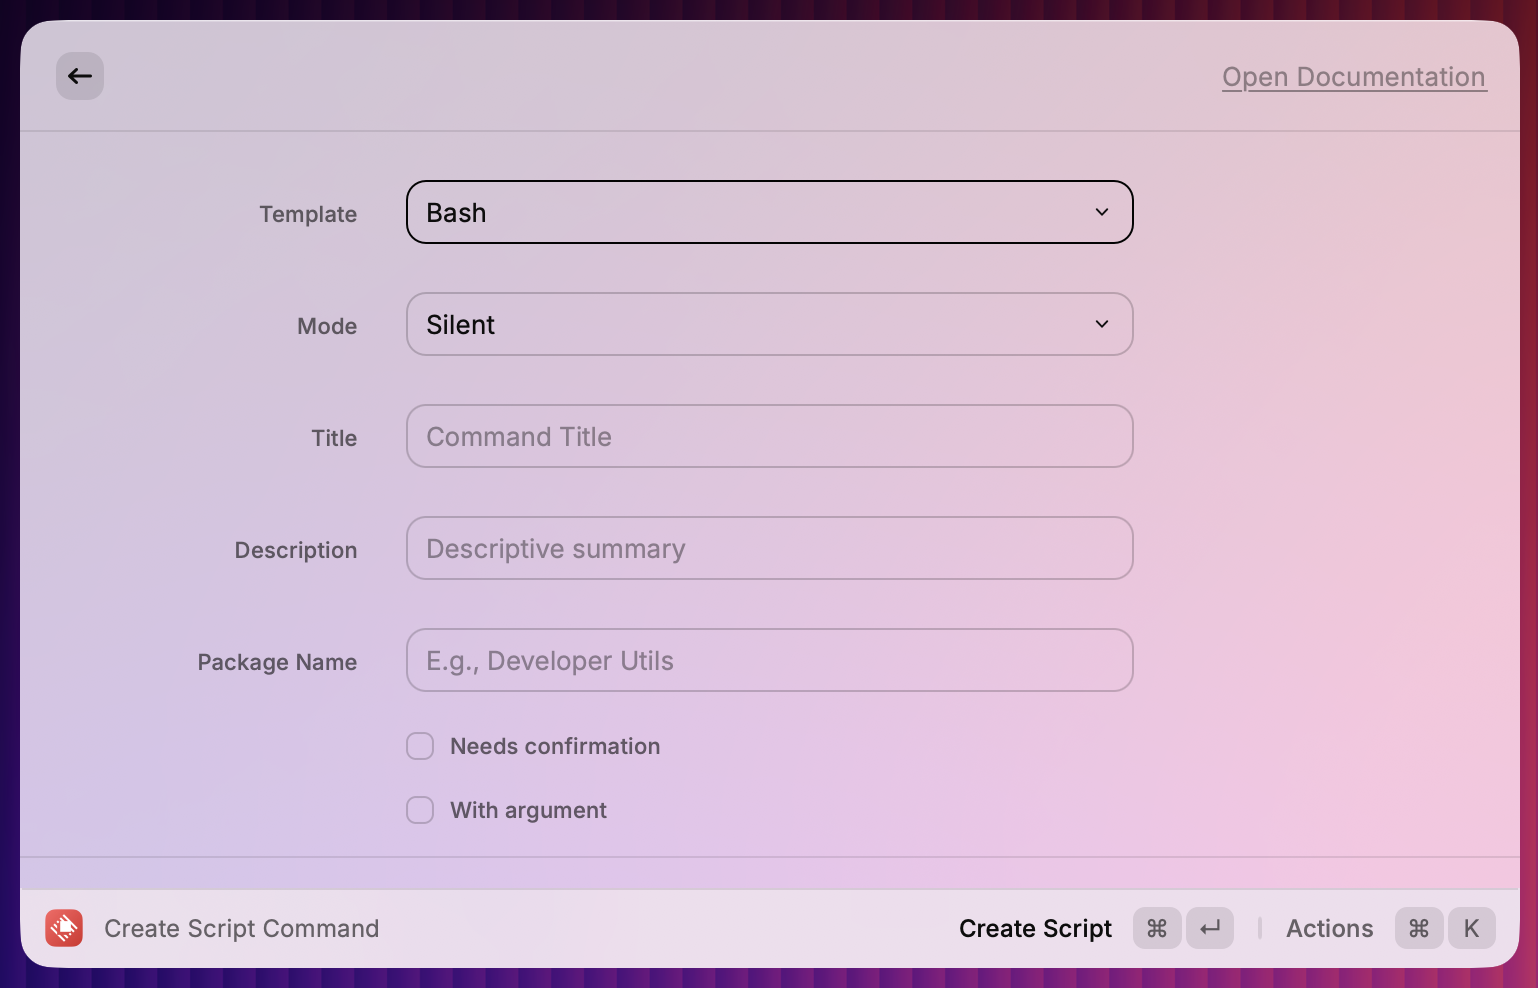
Hit Create Script, and Raycast opens your new script file in your default editor.
Step 2: Add the Script
Raycast generates a script file with your headers already filled in based on the form. At the bottom, you’ll see a placeholder echo "Hello World!".
Replace that echo line with this (keep everything before that header line):
# Get current timestamp for unique site name
TIMESTAMP=$(date +"%H:%M:%S")

# Build the blueprint JSON
BLUEPRINT=$(cat <<EOF
{
  "landingPage": "/wp-admin/",
  "preferredVersions": {
    "php": "8.2",
    "wp": "latest"
  },
  "steps": [
    {
      "step": "login",
      "username": "admin",
      "password": "password"
    },
    {
      "step": "installPlugin",
      "pluginZipFile": {
        "resource": "wordpress.org/plugins",
        "slug": "woocommerce"
      }
    },
    {
      "step": "installPlugin",
      "pluginZipFile": {
        "resource": "url",
        "url": "https://github.com/woocommerce/wc-smooth-generator/releases/latest/download/wc-smooth-generator.zip"
      }
    },
    {
      "step": "installPlugin",
      "pluginZipFile": {
        "resource": "wordpress.org/plugins",
        "slug": "query-monitor"
      }
    },
    {
      "step": "setSiteOptions",
      "options": {
        "blogname": "$TIMESTAMP - WooCommerce Playground",
        "woocommerce_task_list_hidden": "yes",
        "woocommerce_extended_task_list_hidden": "yes"
      }
    },
    {
      "step": "wp-cli",
      "command": "wp wc generate products 25"
    },
    {
      "step": "wp-cli",
      "command": "wp wc generate orders 20"
    }
  ]
}
EOF
)

# Minify the JSON and build the URL
BLUEPRINT=$(echo "$BLUEPRINT" | tr -d '\n' | sed 's/  */ /g')
URL="https://playground.wordpress.net/#${BLUEPRINT}"

# Open in default browser
open "$URL"

# To open in a specific browser in a new window, use:
# open -na "Brave Browser" --args --new-window "$URL"

echo "Opening WooCommerce Playground: $TIMESTAMP"
Save the file. That’s it.
Step 3: Use It
Open Raycast and start typing “woo” or whatever matches your title. Select your command and hit enter. A new browser tab opens with your Playground site loading.
The first load takes 20 to 30 seconds while Playground installs plugins and generates data. After that, you have a fully functional WooCommerce store ready for testing.
Customising the Blueprint
The blueprint is just JSON. You can adapt it for any testing scenario.
Want to test a specific WooCommerce version?
Change the installPlugin step to use a specific version URL:
{
  "step": "installPlugin",
  "pluginZipFile": {
    "resource": "url",
    "url": "https://downloads.wordpress.org/plugin/woocommerce.9.5.1.zip"
  }
}
Need a specific theme?
Add an installTheme step:
{
  "step": "installTheme",
  "themeZipFile": {
    "resource": "wordpress.org/themes",
    "slug": "storefront"
  }
}
Testing with specific plugins?
Add more installPlugin steps. You can install from wordpress.org, GitHub releases, or any URL that serves a zip file.
Different landing page?
Change landingPage to wherever you want to start. /shop/ for the storefront, /checkout/ for checkout testing, or any admin page.
Beyond WooCommerce
This pattern works for any WordPress testing. I have separate scripts for:
- A minimal WordPress install (no plugins, for theme testing)
- WordPress with Gutenberg trunk (for block editor testing)
- WordPress with specific plugin combinations
Each is just a keystroke away.
The Real Value
Without this script, spinning up a test site means remembering the Playground URL, recalling the blueprint JSON syntax, manually adding each plugin step, remembering the WP-CLI commands for generating sample data, and hoping you didn’t miss anything. That’s several minutes of friction before you can even start testing.
With the script, it’s three keystrokes. The blueprint is already configured exactly how you need it. The plugins are already specified. The sample data commands are already there. You’re not remembering anything or assembling anything. You’re just testing.
When testing is frictionless, you test more. When you test more, you catch issues faster. When you catch issues faster, you ship better software.
What Raycast scripts are saving you time? I’d love to hear about your setup in the comments.
Leave a Reply